Knowledge Base
Save us time to focus on some great new features and try our self service knowledge base. Search for anything.
Knowledge Base
Save us time to focus on some great new features and try our self service knowledge base. Search for anything.
If you are familiar with setting up shipping zones and labels in WooCommerce, then you may can skip this part. But if you need to know how to setup shipping for your delivery store then follow these simple steps.
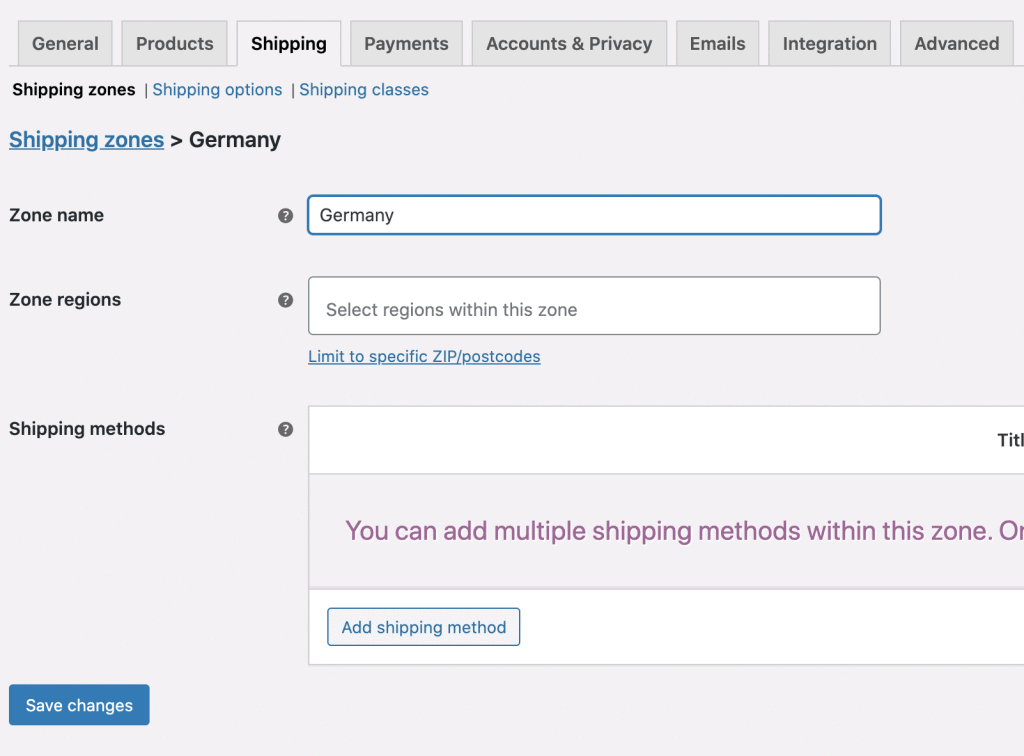
At first you need to setup a shipping zone. A zone is like a region or county where you are selling to. In our example we create a zone called Germany, where we will define specific ZIP codes where we want to delivery to. To create a shipping zone go to WooCommerce > Shipping > Shipping Zones. Then click on the button on top “Add Shipping Zone”.We named the zone Germany, but you can also name that “General” or All. Then we added Germany into zone regions and defined postcodes where we deliver.

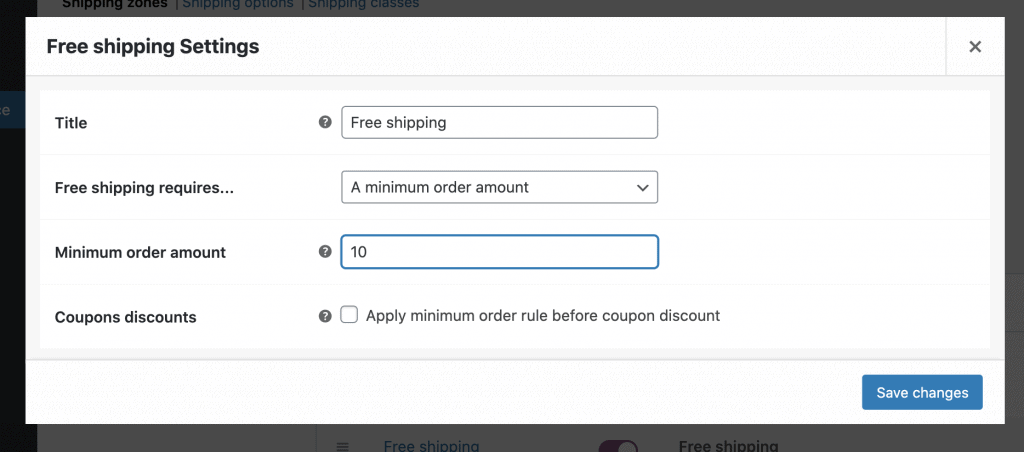
After that we need to add shipping methods to the Zone. You can decide between flat rate, free shipping or local pickup. In free shipping you can also define if a certain amount is required to get free shipping. For example your restaurant only ships above 20€ in Total.

We now added free shipping and local pickup to the Germany shipping zone. Both are enabled in the backend and the customer in the checkout process can choose between one of them.Setup WooCommerce Delivery Plugin

Did not found what you was looking for?
Please submit a ticket with a detailed explanation about your problem.
Submit TicketWhen you visit any web site, it may store or retrieve information on your browser, mostly in the form of cookies. Control your personal Cookie Services here.