Knowledge Base
Save us time to focus on some great new features and try our self service knowledge base. Search for anything.
Knowledge Base
Save us time to focus on some great new features and try our self service knowledge base. Search for anything.
To install our WordPress Form Wizard plugin, please follow our Installation Guide.
After installation, you should be able to see a new menu item “Wizard Forms” in your WordPress admin backend.
If you can not see that menu make sure our weLaunch Framework plugin is installed! It is free.
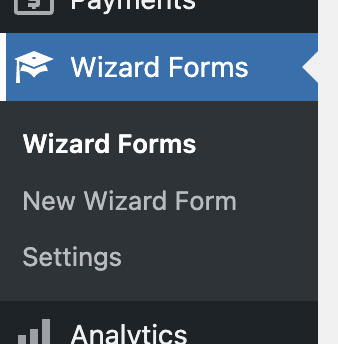
Before you start creating a first wizard form, you should check our plugin settings menu. Navigate to Wizard Forms > Settings. You will see this options panel:
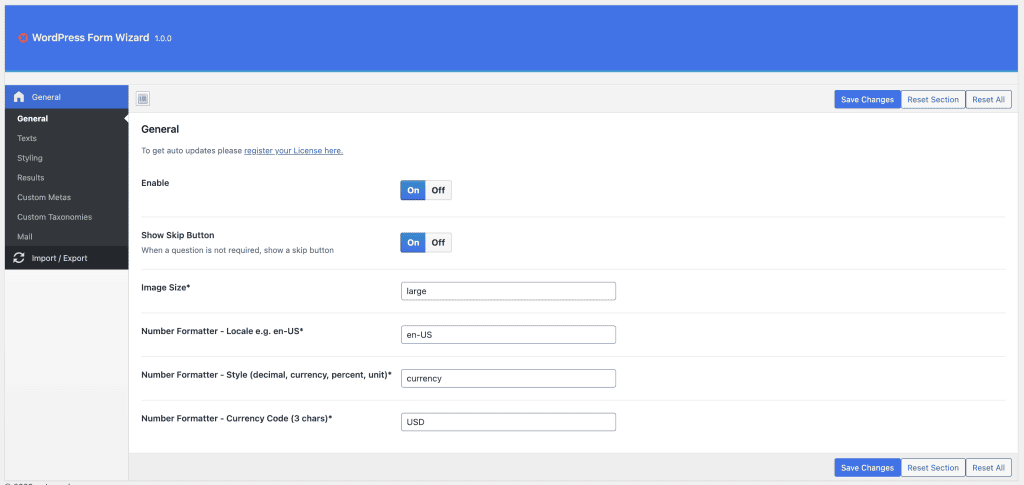
Our settings panel is structured in:
In the general settings, you see settings to disable or enable our plugin as well as showing a skip button, image size and number formatting options. For number formatting, please refer to this documentation of INTL number formatter.
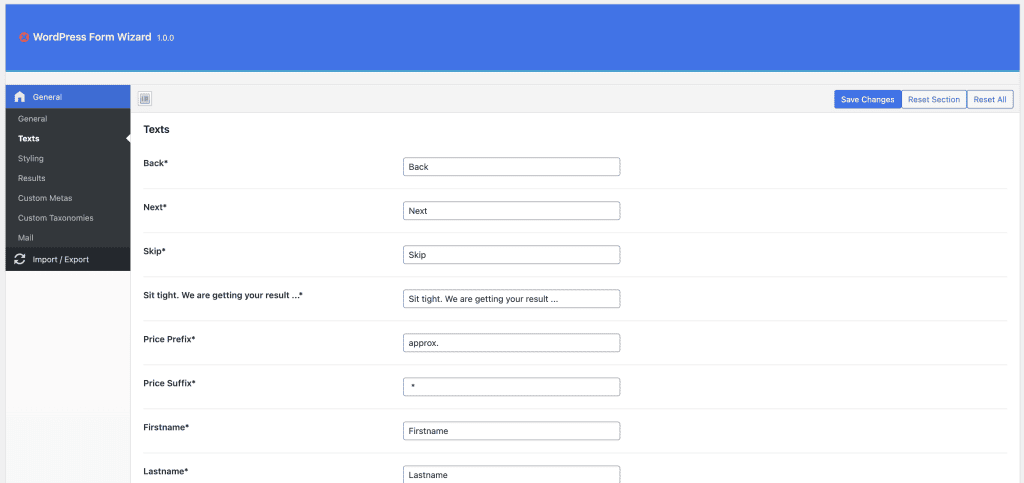
We wanted our plugin to be highly customizable. That is why you can change all texts directly in our plugin settings. Go to text settings and there you can see all strings we use. These can also be changed in WPML > string translations.
The same for texts, also applies for stylings. You can change all used colors directly in our plugin settings in order to fit into your current website design CI. Just go to styling settings and change colors to whatever you want.

When using our plugin for WooCommerce shopping guides or using custom post types, you have to define what item data you want to show in your final result page.
In results settings you can drag and drop data items to reorder, enable or disable them. This gives you maximum flexibility in how data will be shown in the end result list. Note: empty data will never show.
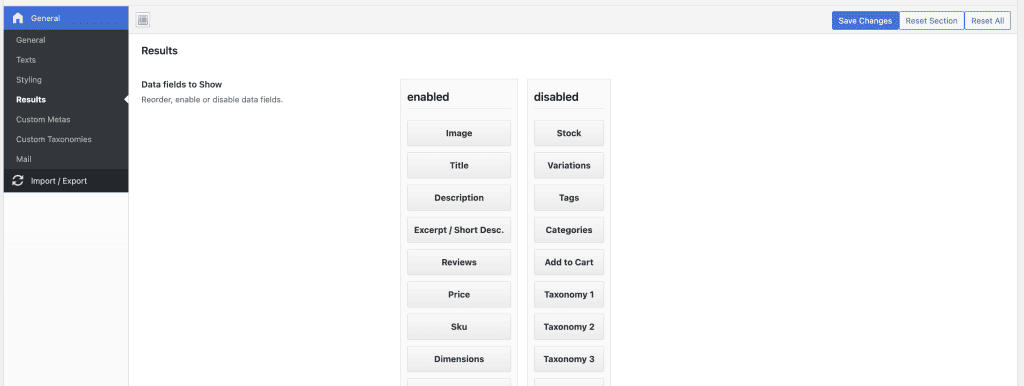
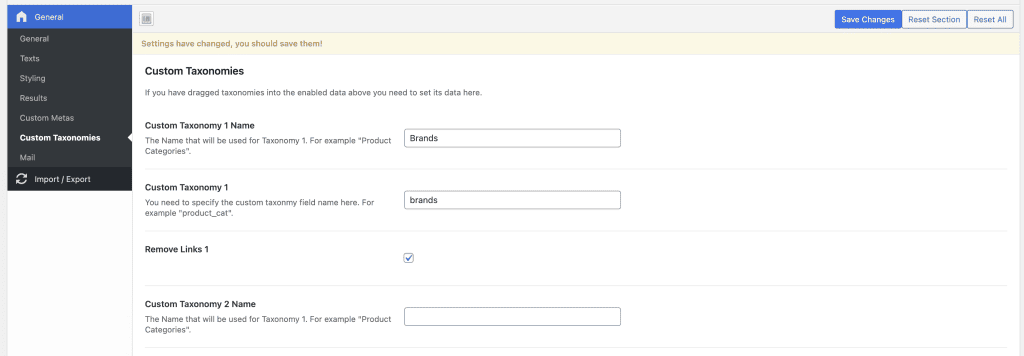
Custom post types, but also products sometimes, use custom taxonomies like Brands. If you want to show them go to result list settings and enable Taxonomy 1 for example. Then go into Custom taxonomies settings and enter the name of your Taxonomy 1. It must match the taxonomy name.
Below you see an example of how results can show up when users are in the final results step of a WooCommerce shopping guide.

When using price calculation forms or even in shopping guides, you can allow users to send their configuration via Email. This allows shop owners, to save customer data and customers will have their final configurations saved in their mailbox.
The mail settings will appear same the results at the end of each guide. In our plugin settings you can configure what form data should appear, what mail text will be send and much more.
Note: the mail settings can also be disabled for each wizard form (see option “show mail”).
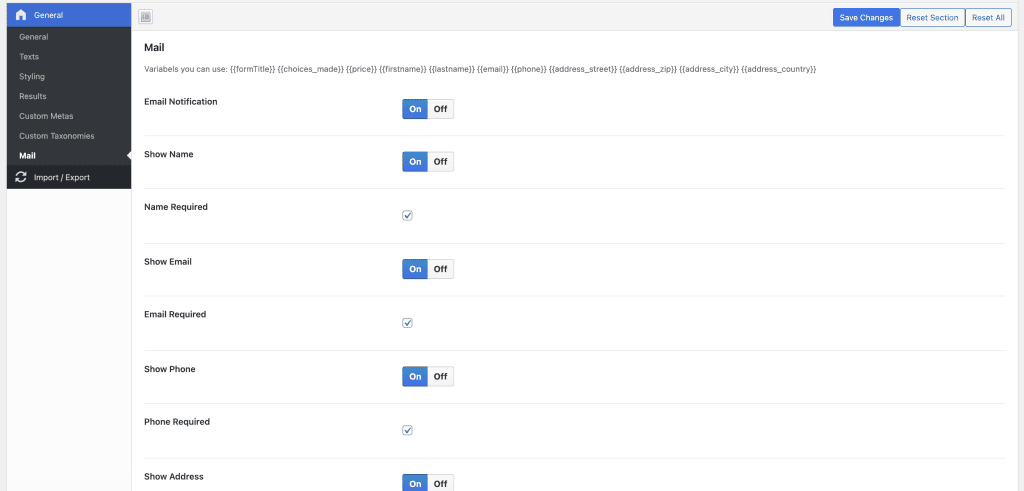
An example how the mail form will show can be seen below. It shows different form fields, GDPR / Privacy checkbox and a send button. After sending, the user will get an email with his configuration and price.
Note: You can hide the price in the frontend also in each form settings. This allows you to show the final price only in the email.
All submitted data are saved in a new database table called wp_form_wizard_entries. We are working on a small dashboard to show all submitted data in your wp admin backend.
All configured? If yes, then go ahead and create your first wizard form. What do you want to create?
Did not found what you was looking for?
Please submit a ticket with a detailed explanation about your problem.
Submit TicketWhen you visit any web site, it may store or retrieve information on your browser, mostly in the form of cookies. Control your personal Cookie Services here.
Hello, i’m very interested in this plugin. Seems to be exactly what I need. But maybe i’m just a bit blind, I can not find a download or purchase button for this “WordPress Form Wizard Plugin”. Could you direct me please … thank you