Knowledge Base
Save us time to focus on some great new features and try our self service knowledge base. Search for anything.
Knowledge Base
Save us time to focus on some great new features and try our self service knowledge base. Search for anything.
Learn how to create a multi step guided selling form for WooCommerce or even custom post types in WordPress with ease. Our WordPress Form Wizard plugin allows you to create complex guides for any post types. This this you can create:
In our demo, we created 2 guides using the shopping guide functionality. One for a car finder using a custom post type and a shopping guide for WooCommerce products.
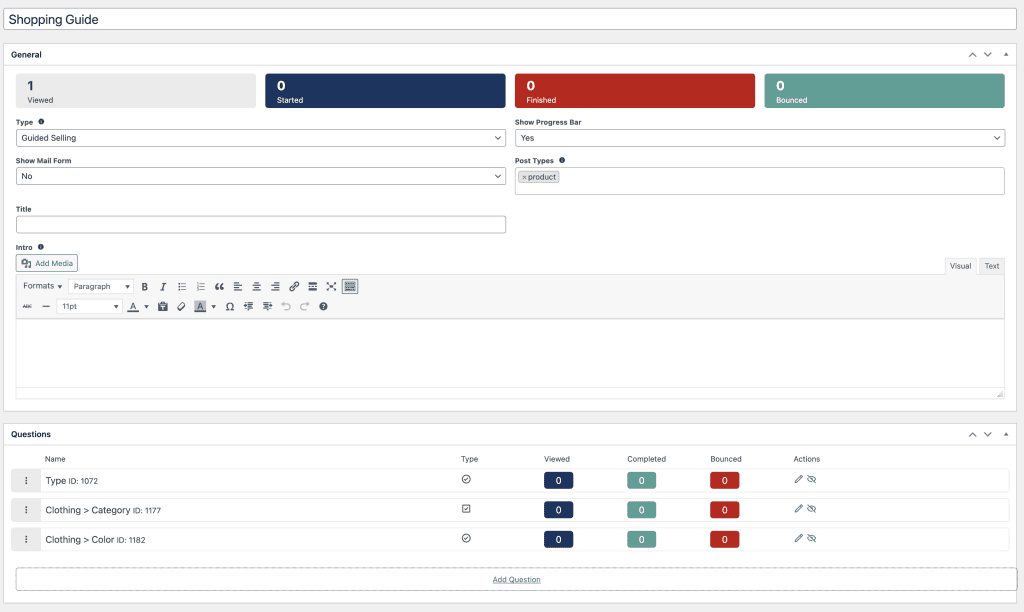
When you edit or a create a new wizard form and want to use it as a selling guide, you need to change the type to “guided selling”. After that, make sure you update / save the form. From now you should see options:
Note: when you leave out the title and intro description the guide will start with the first question directly.

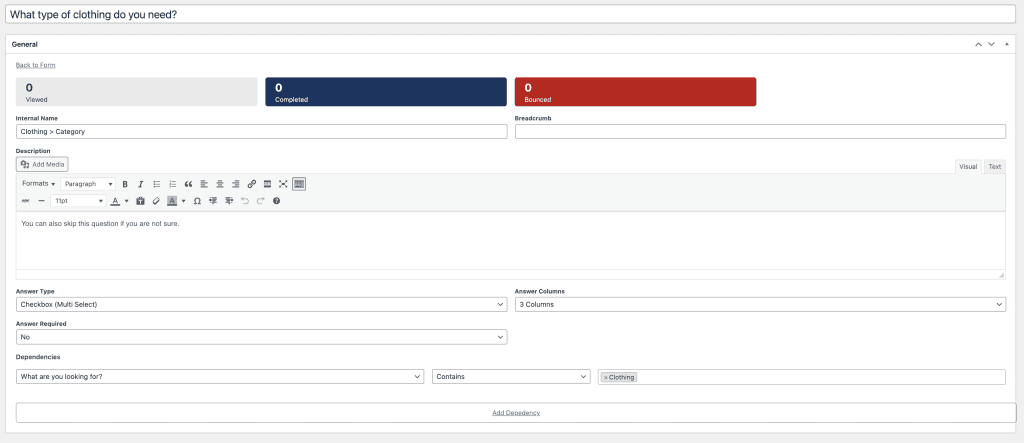
When you edit a question you will see some statistics as well as general settings. These include
In the example below you see that the question for what clothing category is interested, is dependent if the user has choosen clothing in the previous question. You can add multiple terms and also multiple depdencies here.

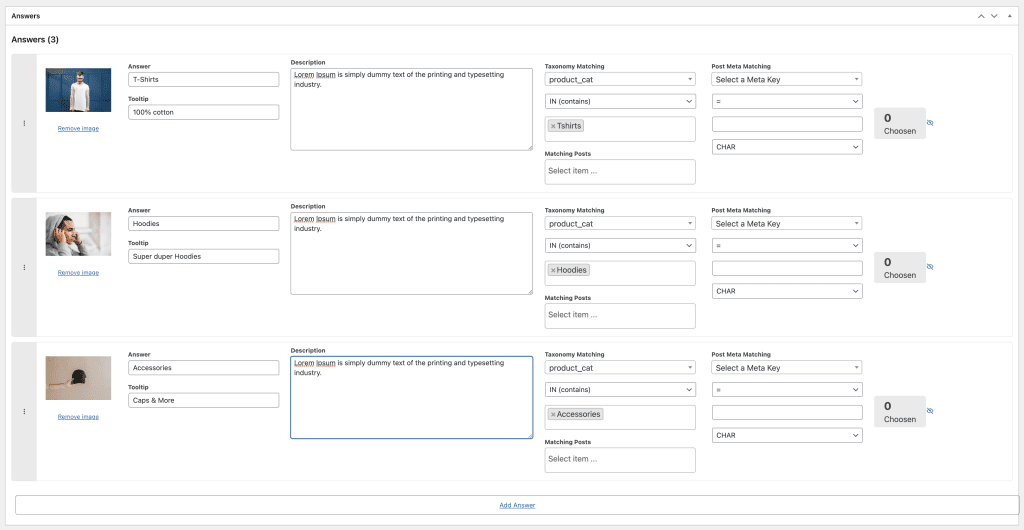
As a question consists of answers, you will see them below the general settings. Each answer consists of:
Each answer can be assigned to a taxonomy or meta query check. With this you have the possibility to assign each answer to match a certain criteria of your WordPress post data. This contains all custom taxonomies as well as WooCommerce attributes, all post meta keys and custom post ids.

Above configuration would look like this:

Did not found what you was looking for?
Please submit a ticket with a detailed explanation about your problem.
Submit TicketWhen you visit any web site, it may store or retrieve information on your browser, mostly in the form of cookies. Control your personal Cookie Services here.