Wenn Sie das Plugin installiert haben, sehen Sie 4 neue Einstellungsmenüs unterhalb des WooCommerce-Menüs in der linken Sidebar.
- Einkaufsführer
- Neuer Einkaufsführer
- Kategorien
- Einstellungen
Das Menü alle Einkaufsführer zeigt Ihnen einen Überblick über alle Ihre Einkaufsführer. Von dort aus oder über das Verwaltungsmenü können Sie mit der Erstellung Ihres ersten Einkaufsleitfadens beginnen.
Einen Einkaufsführer erstellen
Wenn Sie einen Einkaufsführer erstellen, müssen Sie die folgenden Schritte durchlaufen
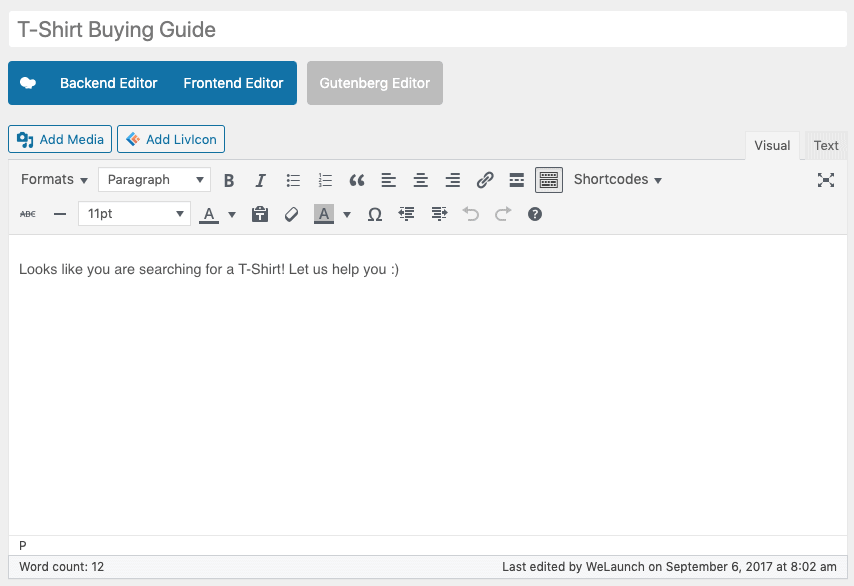
Schritt 1 – Beschreibungen des Einkaufsleitfadens festlegen
- Einen Namen festlegen
- Eine Beschreibung festlegen
- Ordnen Sie es einer Produktkategorie zu (rechte Sidebar)

Step 2- Setup General Information
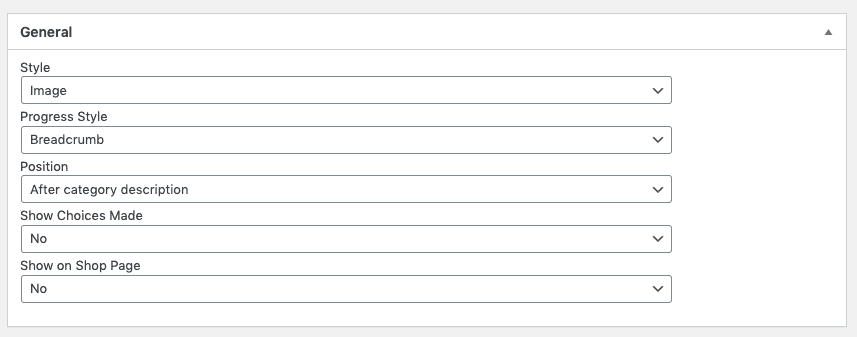
In den allgemeinen Einstellungen jedes Einkaufsführers können Sie einen Stil (Text, Bild oder Modal) festlegen, wie der Führer erscheinen soll (siehe unten). Dann können Sie den Fortschrittsmodus einstellen (Brotkrumen oder Fortschrittsbalken).Next step is to set the position of the Buying Guide – if “After category description” for example does not work, then try another position. Problems with the position most of the time occur, because the Theme is not 100% WooCommerce compliant.Wenn Sie die getroffene Auswahl aktivieren, werden Ihren Benutzern am Ende des Leitfadens die von ihm getroffenen Entscheidungen angezeigt. Auf der Shop-Seite anzeigen wird dieser aktuelle Einkaufsführer auf der Allgemeinen WooCommerce Shop-Seite.
Schritt 3 – Fragen erstellen
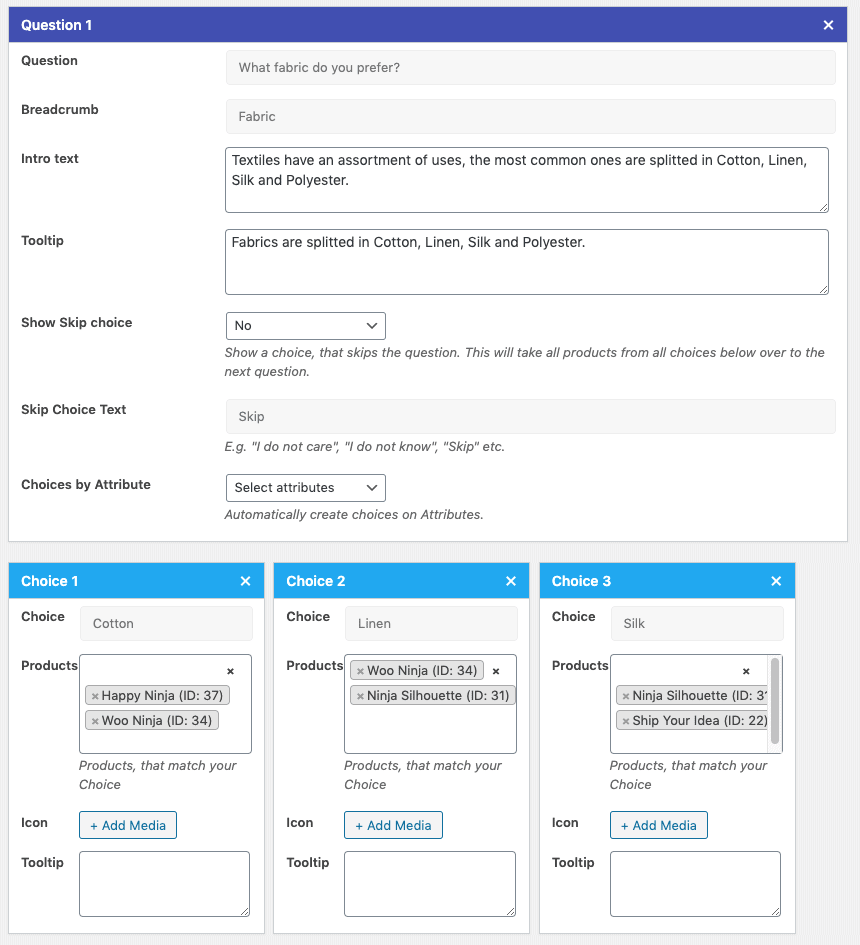
Beginnen Sie mit der Erstellung Ihrer Fragen, indem Sie die Frage selbst einstellen. Fügen Sie dann eine Brotkrume hinzu (wichtig, wenn Sie den Fortschritts-Breadcrumb-Stil verwenden), erstellen Sie einen Einführungstext und einen Tooltip für Ihre Frage, wenn Sie möchten. Dann können Sie eine “Auswahl überspringen”-Option aktivieren und einen benutzerdefinierten Text dafür festlegen.Wenn Sie ein WooCommerce-Attribut als Auswahlmöglichkeit auswählen, ist es nicht möglich, Auswahlmöglichkeiten manuell zu erstellen (siehe unten).
Schritt 4 – Auswahlmöglichkeiten erstellen
Wenn Sie keine automatische Auswahl aus Ihren WooCommerce-Attributen erstellen möchten, können Sie diese individuell einstellen.
Schritt 5 – Manuelle Erstellung einer Auswahl
Eine Auswahl besteht aus einem Namen & zugeordnete Produkte. Nehmen wir an, Sie haben eine Frage “Farbe?”, dann setzen Sie Ihre erste Wahl auf “Schwarz” (oder welche Farbe auch immer) und weisen alle schwarzen Produkte dieser Wahl zu.Darüber hinaus können Sie ein benutzerdefiniertes Auswahlsymbol und einen Tooltip festlegen, wenn Sie möchten.


How do you create a follow up question? If they go for choice #2. then can you add follow up questions under choice #2 to narrow down the product selection?
You can simply create another question. Or what do you mean with follow up?
My first question has 5 Choices.
I would like to narrow down the products by adding more questions to EACH choice.
How do i do this?
Currently when I add the 2nd question; choice #1 & #2 are automatically allocated to [choice# 1 at Question 1] and Choice #3 to [choice #2 at question 1].
How do i direct what question goes under what choice? to make it a funnel question process that narrows down the product with each question.
How do i assign the guide to a page or a popup?
That is currently not possible.
https://mortonperry.co.nz/product-category/pressure-care-mattresses/
i would like the question process to stop if they choose “KING SINGLE” and to continue if they choose “SINGLE”.
How do i do this?
Did you ever get a reply? Is it possible to have follow up questions or to stop the process at a specific question/reply?
Follow up / stop questions are not possible within current version of the plugin.
when do you anticipate it will be available?
Where do you create the questions? i’ve created a new buying guide but i only see general options?
Found it.. was a conflict with my theme.. works now.
Hi,
Can i change the text on the “Start Again” button?